Vanilla Cornmeal Cake with Roasted Strawberries | First Mess Cookbook GIVEAWAY

vanilla cornmeal cake - first mess cookbook | apt 2b baking co

I have been trying to Kondo-punt (thank you Molly for this phrase) a lot of cookbooks out of my life recently due to the extremely saggy shelves they are currently occupying. BUT, I have been patiently waiting for this book - The First Mess Cookbook by Laura Wright - since I had the chance to test a couple of recipes from it last year. After testing those recipes I knew that the book would be amazing, and it truly is. Every page is totally packed with inviting recipes and photography that makes me want to dive right into the page. Not that I expected anything less from Laura. 

There is a lot of noise online, but  Laura's voice always breaks through. Hers is one of the blogs that I have read and enjoyed most consistently in my many years of blogging, and her table is the one that I most often find myself wishing I had a seat. I'm not vegan by any stretch, but Laura's recipes are always SO approachable and I always appreciate her no-nonsense/no judgement approach to plant-based eating and cooking which she has perfectly translated to this book.

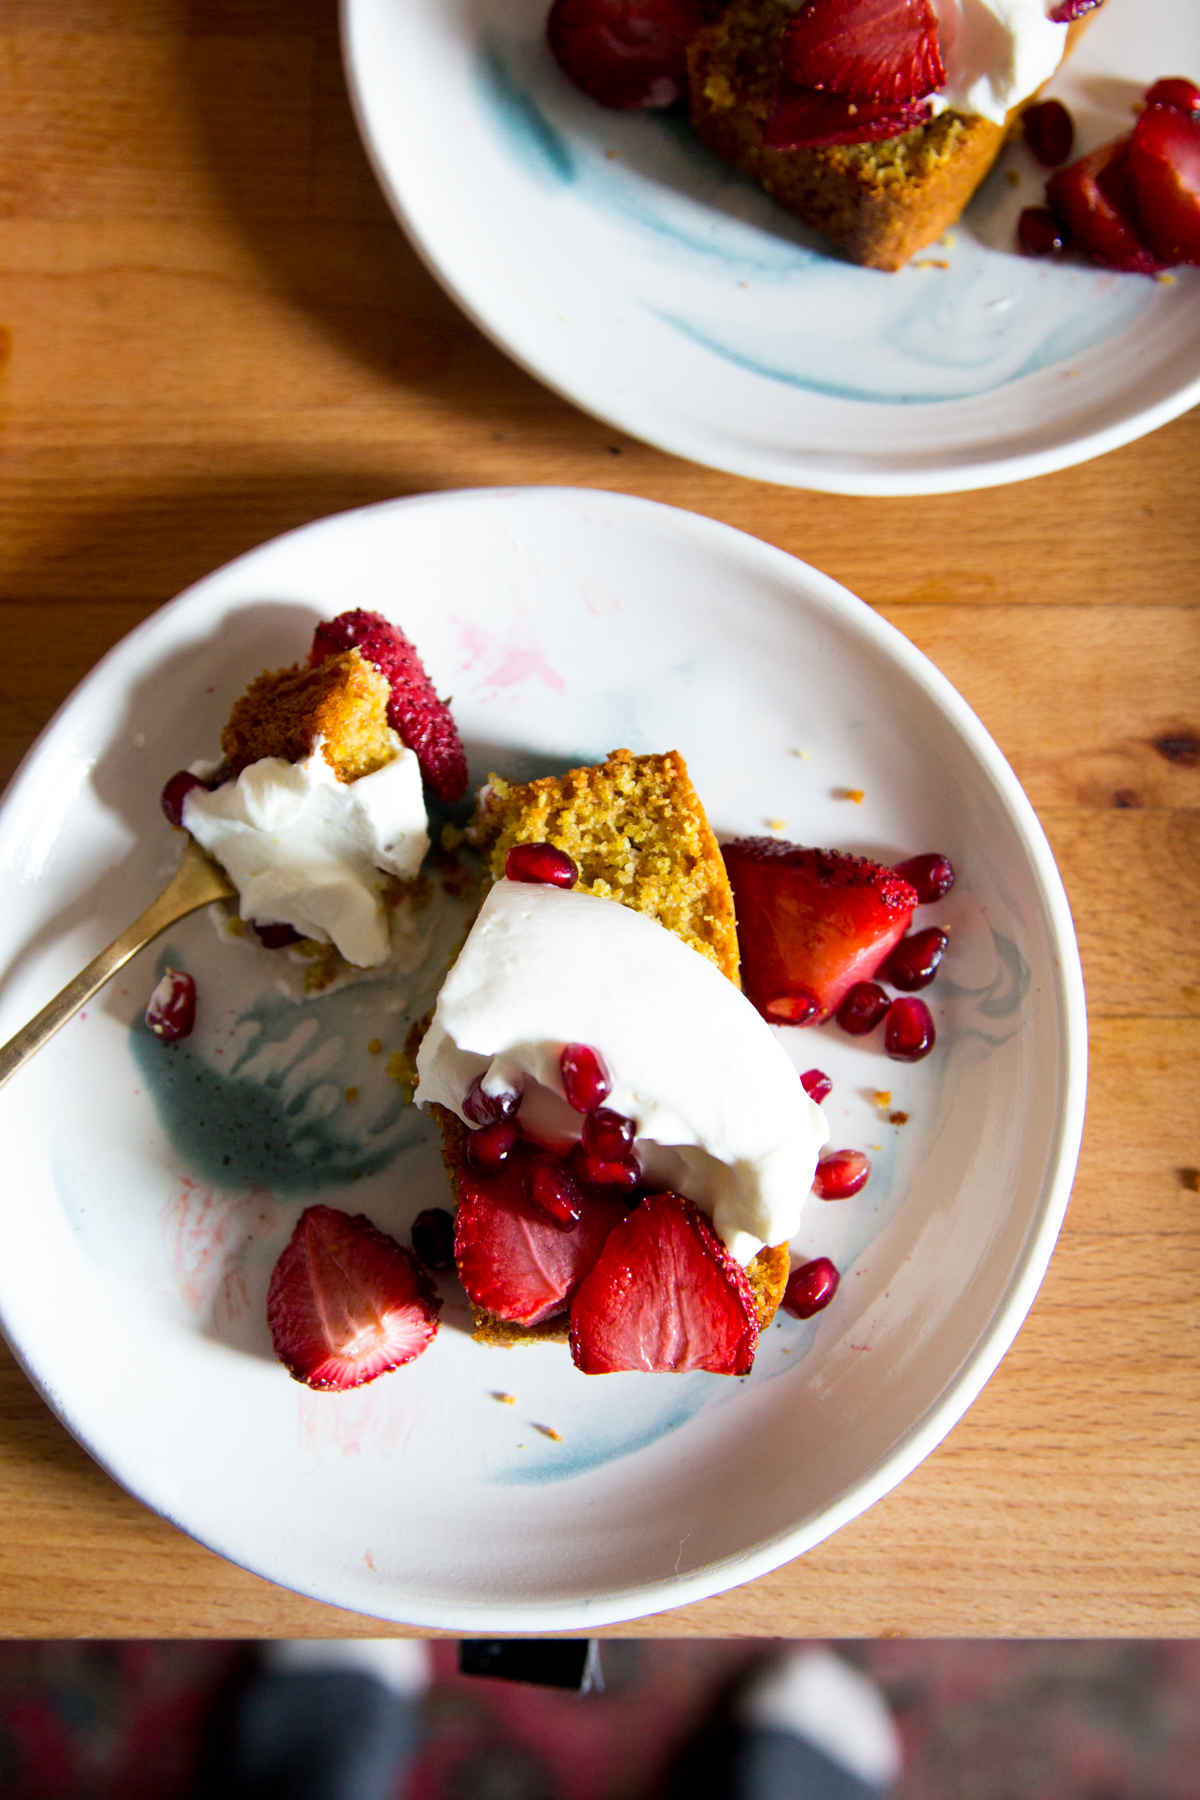
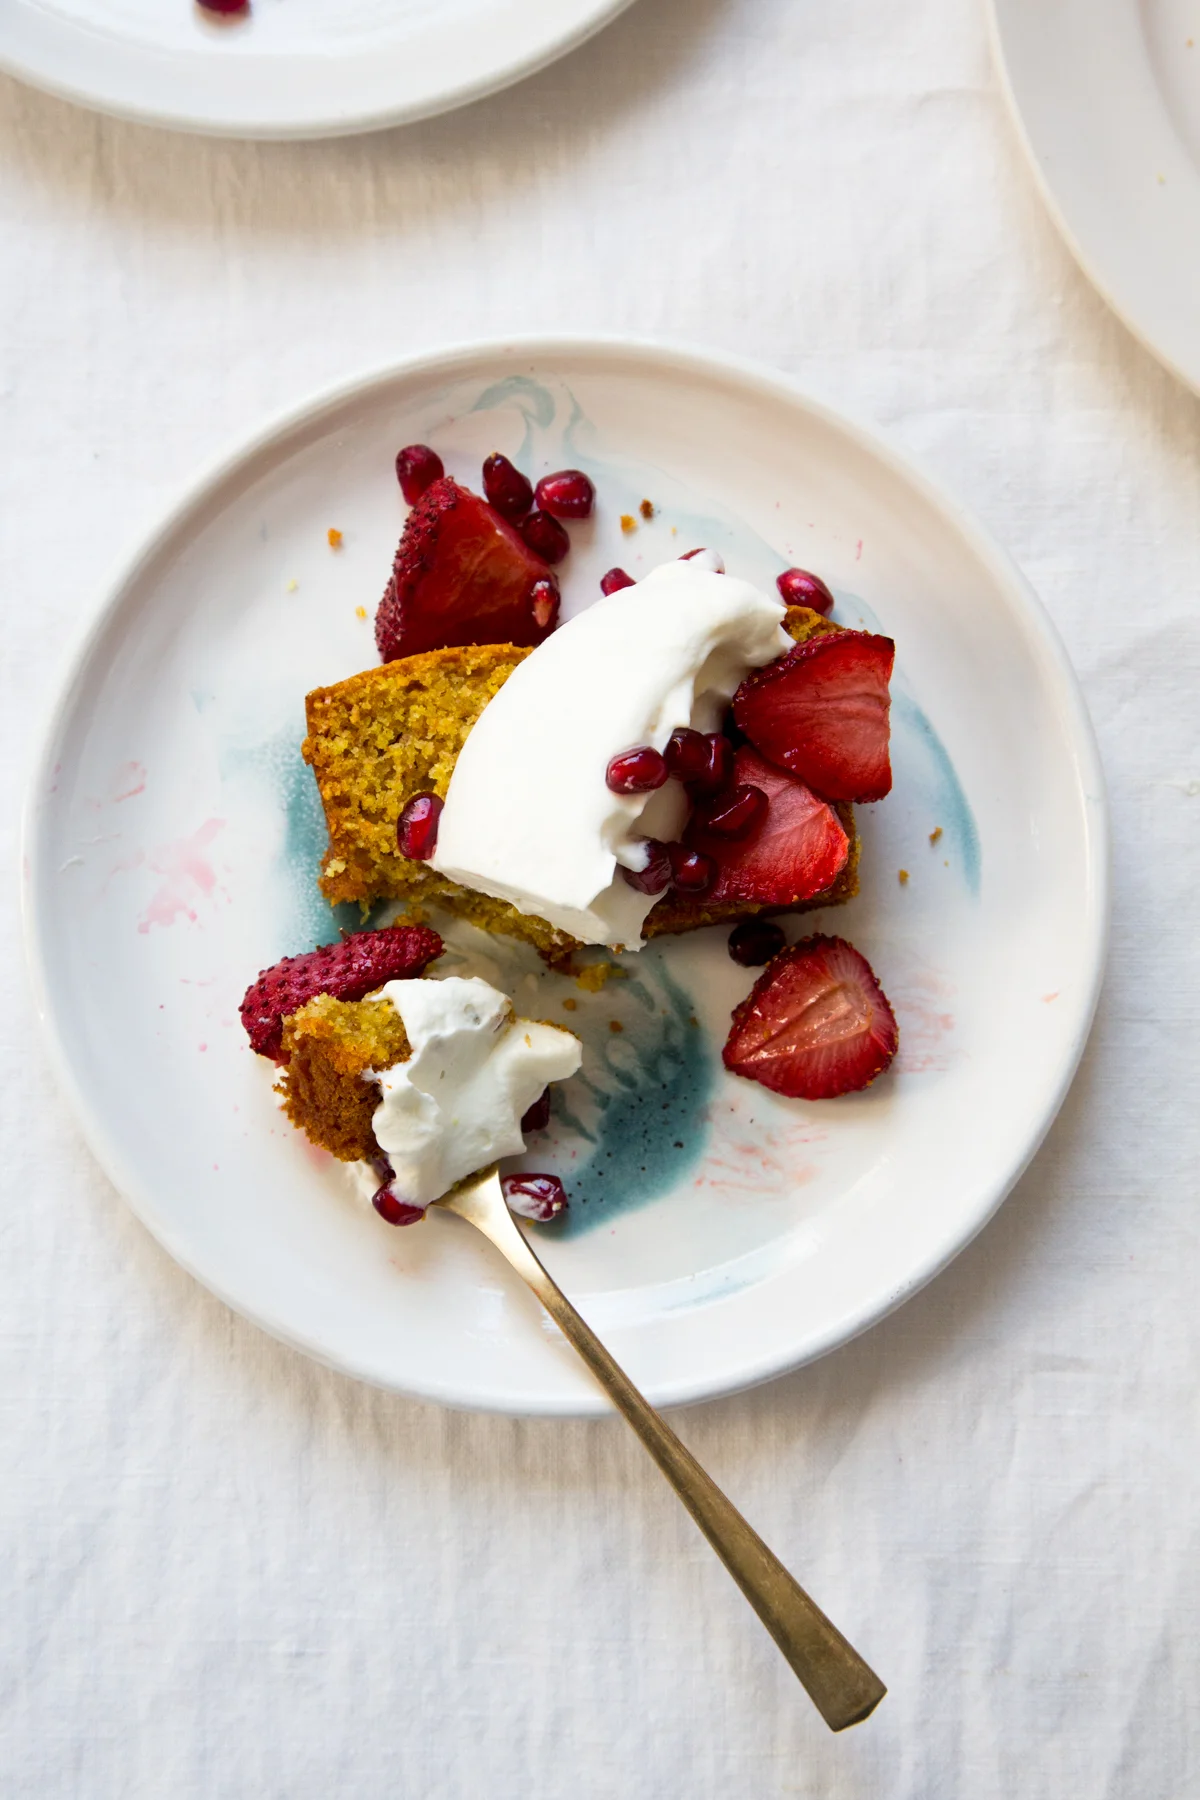
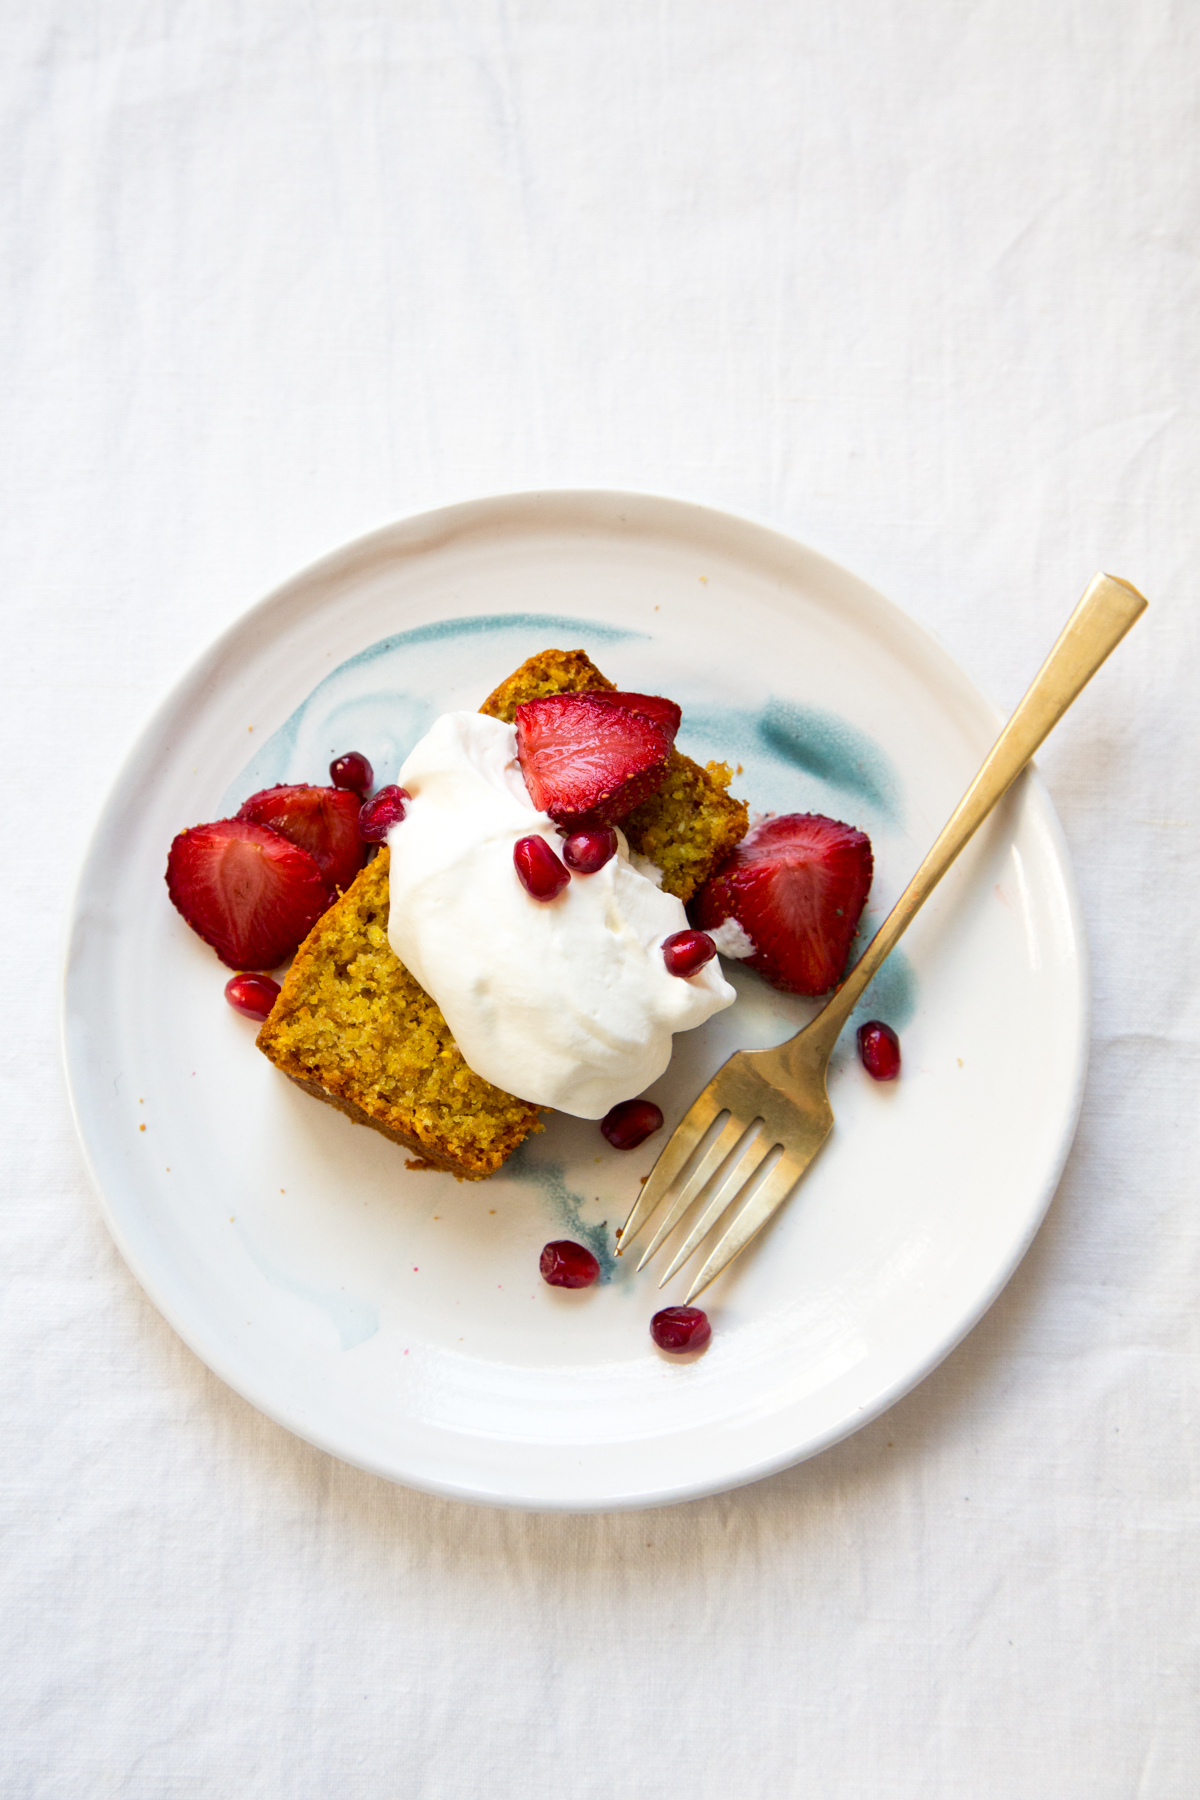
I love a cornmeal cake, and this one sweetened with maple syrup and topped with roasted strawberries was so simple to make and so satisfying. The recipe calls for it to be made in a round cake plan, but I was feeling the slices and baked it in a 4x10-inch loaf pan instead. Then, I ate slices of cake with my coffee every morning until it was gone.


GIVEAWAY: I am so excited to give one away a copy of this stunning book to one of you lucky folks! Just leave a comment on this post with what fruit or vegetable you are most looking forward to this Spring. I"ll pick a winner at random in a week and the book will ship after it's officially published on March 7. Open to US and Canada only, sorry international folks!

UPDATE: The winner has been notified. Check your email, it might be you! If it isn't, you should buy the book anyway ;)


A Few Announcements

Just two spots left for my workshop with Olaiya Land in Paris this Spring. Check out the details HERE

AND

OMG Sweeter off the Vine was nominated for an IACP Cookbook Award, and it's up against Mark Bittman and America's Test Kitchen so I have zero chance of winning (hello, underdog!), but damn is it exciting. This is the big time guys, and I am so surprised and thrilled to be nominated! 

You guys also nominated it as a Community Pick in Food52's Piglet Tournament of Cookbooks, thank you! It's such an honor, and much less nerve-wracking than being in the actual bracket! 

Now let's have some cake!


Vanilla Corn Cake with Roasted Strawberries

Reprinted from The First Mess Cookbook by arrangement with Avery Books, a member of Penguin Group (USA) LLC, A Penguin Random House Company. Copyright 2017, Laura Wright.

Makes one 9-inch (23 cm) cake

¾ cup (175 mL) full-fat coconut milk

1 teaspoon (5 mL) fresh lemon juice

1 cup (250 mL) cornmeal (not coarse)

1 cup (250 mL) whole spelt flour

1 teaspoon (5 mL) lemon zest

1 tablespoon (15 mL) aluminum-free baking powder

¼ teaspoon (1 mL) baking soda

1 teaspoon (5 mL) fine sea salt

½ teaspoon (2 mL) ground turmeric (optional)

½ cup + 2 tablespoons (125 mL + 30 mL) pure maple syrup

½ cup (125 mL) sunflower oil, plus extra to grease pan

1 teaspoon (5 mL) vanilla bean paste OR pure vanilla extract

roughly 1 quart (4 cups/1 L) whole strawberries (smaller berries are preferable)

Whipped Coconut Cream for serving (optional)

1. Preheat the oven to 350°F (180°C). Lightly grease a 9-inch (23 cm) round cake pan with sunflower oil. Cut a circle of parchment paper to fit in the bottom of the pan and press it in. Lightly grease the parchment, and set aside.

2. In a medium bowl, whisk together the coconut milk and lemon juice. Let this mixture sit for 5 minutes so that the milk can curdle slightly.

3. In a large bowl, whisk together the cornmeal, spelt flour, lemon zest, baking powder, baking soda, sea salt, and turmeric, if using.

4. Make a well in the center of the cornmeal mixture. Add the maple syrup, sunflower oil, vanilla, and coconut milk mixture. With a spatula, gently mix until you have a smooth and unified batter. Avoid overmixing.

5. Scrape the batter into the prepared cake pan and slide the pan into the oven. Bake the cake for 25 to 28 minutes or until the top is golden and a toothpick inserted into the center comes out clean. Let the cake cool completely. Raise the oven temperature to 400°F (200°C).

6. Cut the strawberries into halves or quarters (depending on size), and place them on a parchment-lined baking sheet. Slide the baking sheet into the oven and roast the strawberries until they become juicy and jammy, about 20 minutes.

7. Serve slices of the corn cake with a few roasted strawberries and some Whipped Coconut Cream (page 271) if you like.

vanilla cornmeal cake - first mess cookbook | apt 2b baking co

Mini Cheese Danish

cream cheese danish | apt 2b baking co
cream cheese danish-0394.jpg
cream cheese danish | apt 2b baking co
cream cheese danish-0418.jpg
cream cheese danish | apt 2b baking co
cream cheese danish-0427.jpg

I remember hitting up the grocery store pastry case on the way out of town on family road trips and skipping over the chocolate doughnuts to head straight for the danish - cream cheese was always my favorite. Cheese Danish represent the best of all breakfast pastry worlds - crisp buttery pastry, slightly savory filling, and a little bit of sweet glaze. I kind of can't believe I hadn't made them before I found this recipe.

Danishes were always a little intimidating to me because they are made with laminated yeast dough which is time consuming to make and can be a little fussy. I have made croissants a couple of times, but honestly the time and planning it takes to make them is a total turnoff, even if the results are delicious.

But, when I spotted this recipe I knew I had to try it. It comes from Samantha Seneviratne by way of the NY Times and it is SO SMART and a lot less involved than traditional laminated yeast dough. It can also be made way ahead of time, and it's made in the food processor (no knead!) making these perfect for a brunch time treat. 


There are still a few spots available for my food and photography workshop in PARIS this Spring with Olaiya Land. Learn more here


Cheese Danish

makes 9 medium or 16 mini Danish

recipe by Samantha Seneviratne for the NY Times

The Danish dough requires quite a bit of hands-off resting time so make sure to factor that in to your plans. I made these a few times, once with labne instead of cream cheese in the filling which worked great. The filling was a bit softer than the cream cheese version, but the extra tang from the labne was a nice bonus flavor. If you've used labne, you'll need to fill the pastries a bit differently to account for the texture of the filling, instructions are within the recipe. Also, the original recipe calls to make the Danishes a bit bigger, but I loved the idea of little two-bite minis so I went for it.

1 8-ounce package cream cheese (or labne)

1 1/4 cups confectioners’ sugar

1 large egg yolk

pinch salt

1/2 teaspoon vanilla extract

1 batch Danish dough (recipe below)

1 large egg, lightly beaten

2 tablespoons milk

In a large bowl, beat the cream cheese, 1/4 cup confectioners’ sugar, egg yolk, salt and vanilla until smooth. Transfer the mixture to a pastry bag or resealable plastic bag; set aside.

On a lightly floured surface, roll the dough out into a 12 1/2-inch square. Trim 1/4 inch off each edge. Cut the dough into nine 4-inch squares, or 12 2-inch squares for mini danish. Brush the corners of each square with a bit of the beaten egg, then fold each corner into the center and press down gently. Transfer the squares to 2 parchment-lined baking sheets.

Pipe the cheese filling onto the center of each dough square. (If you've made the filling with labne, pipe the pastries half full and reserve the rest of the filling in the fridge while they rise.) Loosely cover the pastries with plastic wrap and let stand until slightly puffed, 60-80 minutes. Heat oven to 425ºF.

Remove the plastic and gently brush the top and sides of the dough with the beaten egg. Bake for 10 minutes, then rotate the sheets and reduce oven temperature to 375 degrees. (If using the labne filling, pipe the remaining filling over the top of the half baked filling) Continue to bake until pastries are puffed and deep golden brown, another 6 to 8 minutes.

Meanwhile, whisk together the remaining 1 cup confectioners’ sugar and the milk. Let the Danish cool slightly on the sheet then drizzle with the glaze. Serve warm or at room temperature.

Danish Dough

1 1/2 cups bread flour, plus more for the work surface and the rolling pin

2 tablespoons granulated sugar

2 teaspoons active dry yeast

3/4 teaspoonkosher salt

14 tablespoons cold, unsalted butter (1 3/4 sticks), roughly cubed

1 large egg

1/4 cup cold milk

Combine the flour, granulated sugar, yeast and salt in the bowl of a food processor. Add the butter and pulse to combine. The butter should be the size of small marbles and peas. Transfer this mixture to a medium bowl.

In a small bowl, whisk the egg, milk, and 2 tablespoons water.

Add the egg mixture to the flour mixture. Using a rubber spatula, fold the mixture until it is evenly moistened. Turn the dough out onto a piece of plastic wrap, shape into a small rectangle, and wrap well. Chill for at least 3 hours, and up to 2 days.

On a lightly floured surface, using a floured rolling pin, roll the dough out to an 8-by-15-inch rectangle. With a short side facing you, fold the dough in thirds like a letter, bringing the top third of the dough down, then folding the bottom third up. Use a bench scraper to help lift and fold the dough if necessary. At this point, the dough will be rough and shaggy with visible butter pieces; as you roll and fold the dough it will come together. Rotate the dough 90 degrees. Repeat the rolling and folding process, then rotate the dough once more and roll and fold again. As you work, dust the work surface, your hands and the rolling pin with flour as necessary. Wrap the dough in plastic wrap and refrigerate for at least 1 hour.

Repeat the entire rolling and folding process one more time for a grand total of six turns. If the dough starts to fight you and become difficult to roll at any point, just pop it in the fridge for an extra rest. Wrap the dough and refrigerate for at least 2 hours, or overnight.