Sister Pie's Buttered Rum Shortbread

Buttered Rum Shortbread | apt 2b baking co

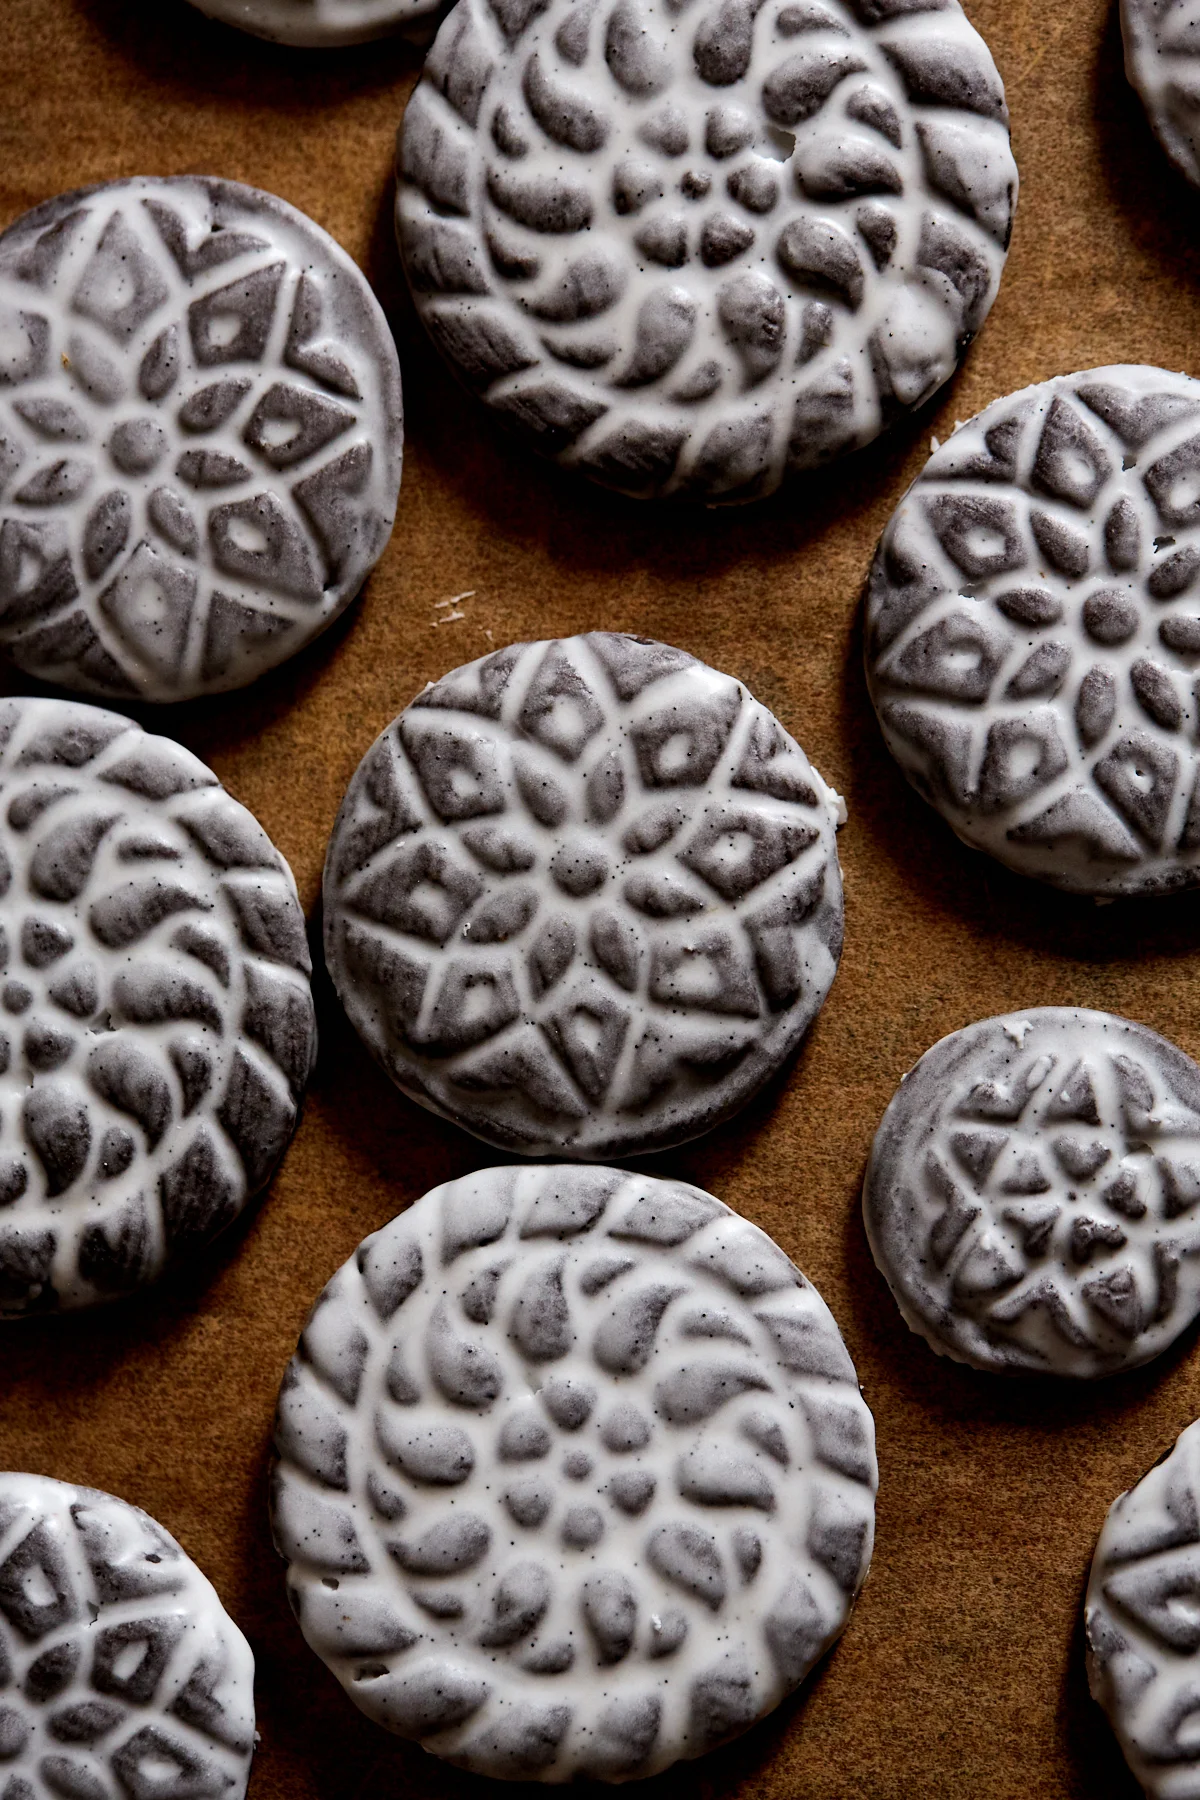
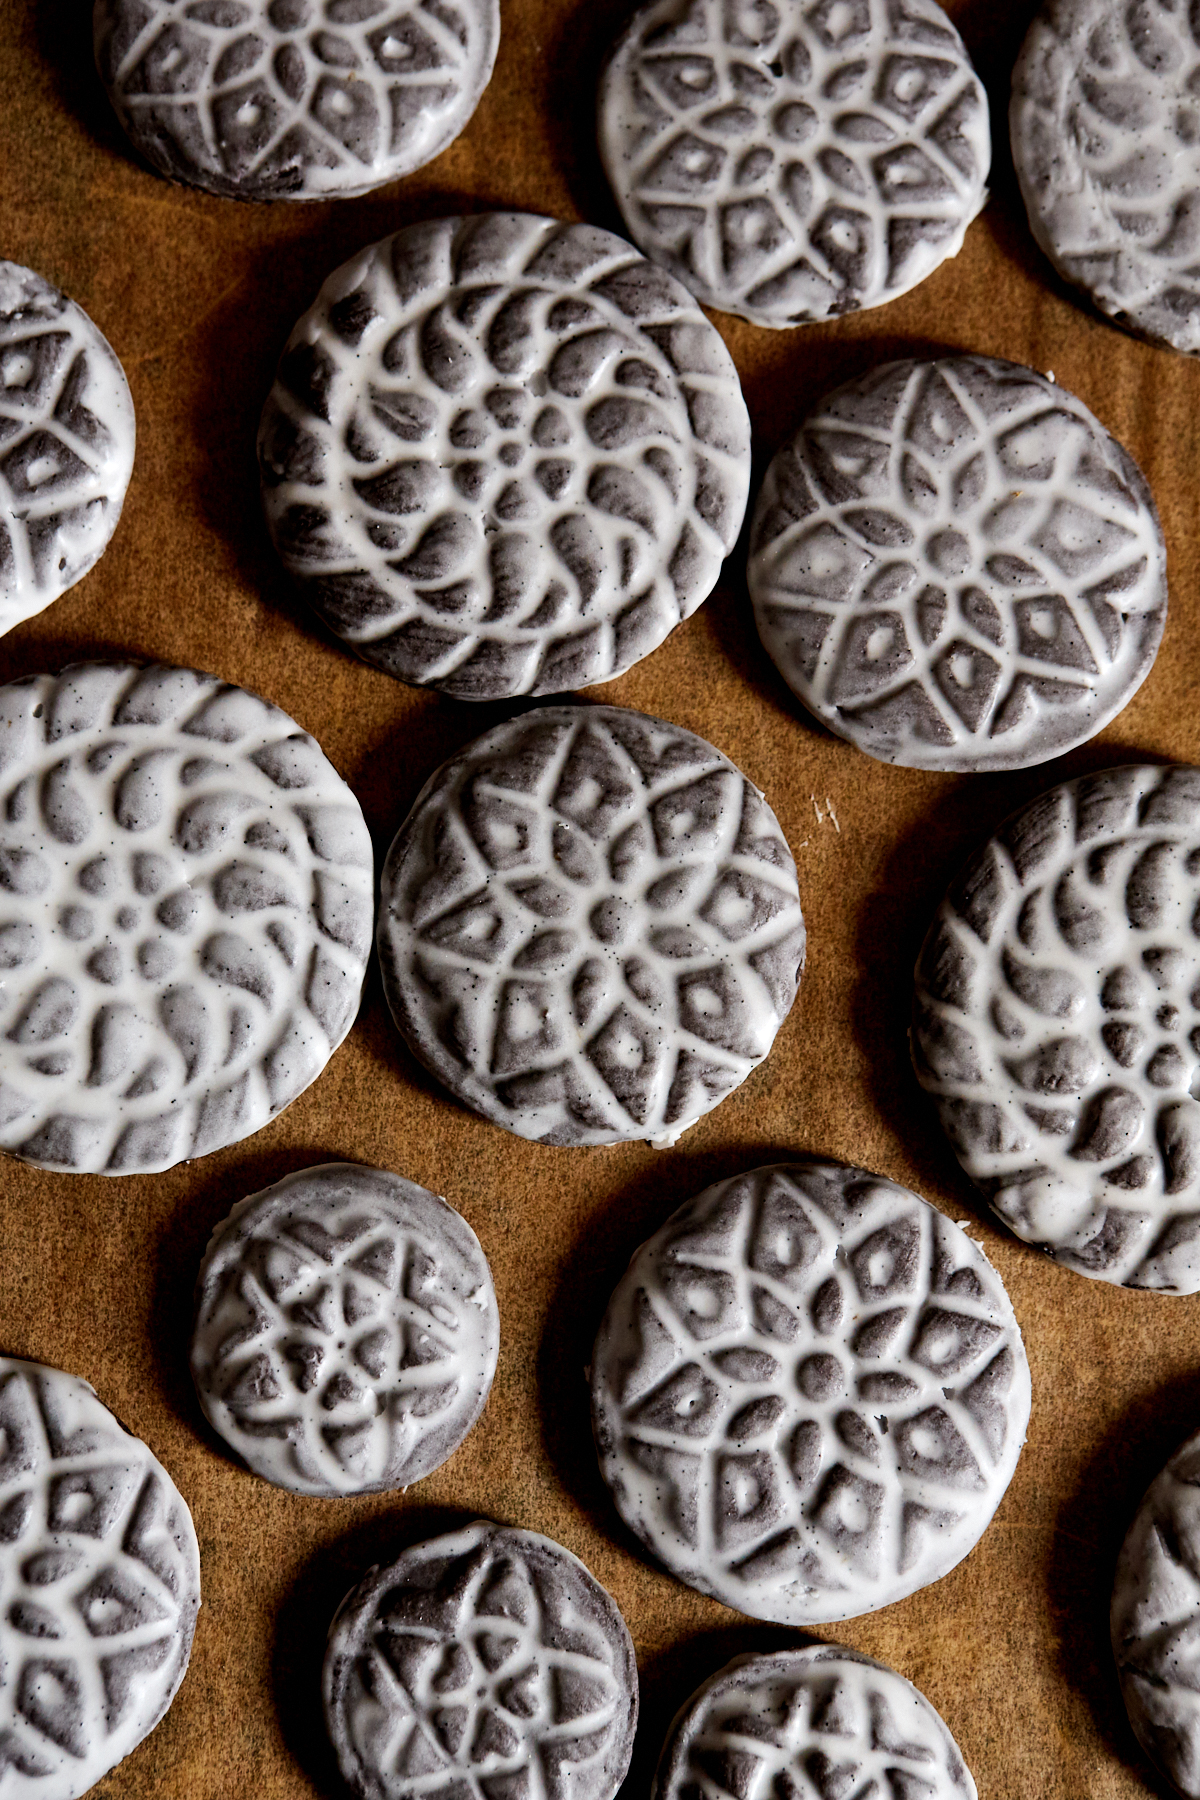
These slice and bake cookies are my favorite sort of thing to put in a cookie assortment because they are so easy to make and so sneakily delicious. You might see a light brown round like this on a cookie plate and pass it up for something a little more exciting looking or powdered sugar coated, but when you take a bite you will be so pleasantly surprised. They are lightly spiced, crisp, and buttery with a little kick of rum, because Christmas. I also added a sprinkle of crushed freeze dried raspberries - you know - for flair. Bonus: they also stay fresh for quite awhile and the flavors get even better after a day or two.

The recipe comes from Sister Pie, a cookbook that came out this Fall, which is filled with so many incredible sounding recipes. I admit, I haven’t made a Sister Pie yet, but I’m sure the flavors are as spot on as these cookies!


Sister Pie’s Buttered Rum Shortbread

Makes 36 cookies

From Sister Pie by Lisa Ludwinski

I made a few small changes to Lisa’s recipe - I used browned butter in the icing instead of coconut oil and added sprinkle of dehydrated raspberries after I glazed the cookies, I also added 1/2 teaspoon more salt to the shortbread dough. The recipe that follows is straight from the book without my mods.

Shortbread

2 1/4 cups all purpose flour

1/2 teaspoon cinnamon

1/2 teaspoon nutmeg

1/4 teaspoon cloves

1/2 teaspoon kosher salt

1 cup unsalted butter, room temperature

3/4 cup powdered sugar

2 Tablespoons dark or spiced rum

1/2 teaspoon vanilla extract  

Rum Icing

3/4 cup powdered sugar plus more as needed

2 teaspoons coconut oil, melted

2 teaspoons dark or spiced rum

2 tablespoons heavy cream, plus more as needed

1/4 teaspoon kosher salt

1/4 teaspoon cloves

Mix the dough. In a medium bowl, whisk together the flour, cinnamon, nutmeg, cloves, and salt. Set aside.

Place the butter and powdered sugar in the bowl of a stand mixer fitted with the paddle attachment and cream on medium speed for about 3 minutes, until very smooth with no visible chunks of butter.

Use a silicone spatula to scrape down the bowl, then add the rum and vanilla and mix until just incorporated. Add the flour mixture all at once and mix on low speed until completely incorporated. Remove the dough from the bowl and shape into a cylindrical log approximately 1 1/2-inches in diameter. Wrap tightly in plastic wrap and refrigerate for at least 40 minutes. You can mix and shape the dough up to 2 days in advance and store it in the refrigerator until 1 hour before you intend to slice the dough. Alternately, you may freeze the dough for up to 3 months, then let it thaw in the refrigerator overnight before proceeding with the recipe.

Preheat your oven to 350ºF. Line two baking sheets with parchment paper.

Remove the dough from the refrigerator, unwrap it, and place on a cutting board. Using a sharp chef’s knife, slice the cookies about 1/4-inch thick. Carefully transfer them to the parchment-lined baking sheets.

Place the baking sheets in the oven and bake for 14 to 16 minutes, until the edges are just slightly golden.

Remove the baking sheets from the oven and transfer the cookies to wire racks to cool.

Make the Icing. While the cookies are cooling, in a medium bowl, whisk together the powdered sugar, coconut oil, rum, cream, salt, and cloves until very smooth. The texture should remind you of Elmer’s glue. Yum! If the icing seems a little dry, whisk in a bit more heavy cream, If it seems a little too wet, whisk in the powdered sugar, 1 tablespoon at a time.

Once the cookies have fully cooled, use a small offset spatula or knife to spread a very thin, even layer of icing across the tops of the cookies. It should be carefully smoothed, not gloppy. Return the cookies to the baking sheets to hive the icing a chance to set up before serving. Store the iced cookies in an airtight container for up to 1 week.


Stamped Brownie Cookies

Stamped Brownie Cookies | apt 2b baking co

Last year I fell in love with stamped gingerbread cookies so this year I was primed and ready for another stampable cookie for my holiday packages. I find that darker doughs - like chocolate or gingerbread are the most dramatic when glazed, so I went for deep rich chocolate with both Dutch process and black cocoas. You can stamp just about any cut out cookie dough that holds it’s shape while baking though, so if you’ve invested in stamps try out a few doughs. And alternately, these cookies are absolutely gorgeous when stamped and glazed, but also work well as cut out cookies without a stamp. Happy Baking! I’ll be back soon with more cookies!


Stamped Brownie Cookies

makes about 3 dozen cookies, depending on the size

Slightly adapted from Smitten Kitchen’s Brownie Roll-Out Cookies

These soft and chewy chocolate cookies are gorgeous when stamped, but also work well as cut out cookies if you don’t have a stamp. Flavor the glaze however you like, but a little peppermint and vanilla is nice for the holidays. I bet a little bit of espresso powder instead would be just delicious. Make sure to not over bake the cookies, they’ll lose their chew and will be more of a standard sugar cookie. I found 7 minutes in my oven was just right, but keep an eye on yours as all ovens vary. I like to brush the glaze on with a pastry brush. Use a thin layer to see lots of the cookie peeking through or a thicker layer for a more opaque look.

Brownie Cookies

3 cups (384g) all purpose flour

1/2 cup (50g) dutch process cocoa powder

1/2 cup (50g) black cocoa powder (or dutch process)

1 teaspoon kosher salt

1/2 teaspoon baking powder

1/4 teaspoon cinnamon (optional)

1 cup (225g) unsalted butter, softened

1 1/2 cups (330g) light brown sugar

2 large eggs

1 teaspoon vanilla extract


Glaze

1 cup confectioners sugar

3 tablespoons cream

seeds from 1/2 vanilla bean or 1/2 teaspoon vanilla paste

1 teaspoon peppermint extract

pinch salt

Whisk the flour, cocoas, baking powder, and salt together in a bowl.

In the bowl of a stand mixer, combine the butter and sugar. Cream until light and fluffy then add the eggs one at a time. Mix until well combined then add the vanilla.

Add the dry ingredients all at once and mix until combined. Make sure to scrape the bottom and sides of the bowl to ensure the dough is evenly mixed.

Turn the dough out onto a piece of plastic wrap and wrap tightly. Refrigerate the dough for at least one hour and up to 2 days.

When you are ready to bake, arrange two racks as close to the center of the oven as possible and heat the oven to 350ºF. Line two baking sheets with parchment paper.

Work with half of the dough at a time and roll out the dough so it’s about 1/4-inch thick. Dip the cookie stamps in a bowl of cocoa powder or flour, shake off any excess and then press them firmly into the dough, one at a time, to create a deep imprint. Use a round cutter to cut the cookies.

Transfer the cookies to the lined baking sheets about 1-inch apart. Re-roll the dough scraps and continue to stamp and cut until all the dough is used up. Bake the cookies until they are just firm to the touch and puffed, 7-10 minutes. Rotate the baking sheets from top to bottom and front to back halfway through baking.

Prepare the glaze while the cookies are baking as it is best brushed on while they are still warm. Whisk all of the ingredients together in a small bowl. It should be the texture of Elmer’s Glue. If it seems a little thin, add a tablespoon or two of confectioners sugar. If its thin, add a little more cream.

Remove the cookies from the oven, let them rest for 5 mins, then brush or dab the glaze all over with a pastry brush. Transfer to a wire rack to cool completely. Cookies will keep for a few days in an airtight container at room temperature.


I used hand carved cookie stamps for these cookies. Zozo Baking sells similar ones.

You can also find cookie stamps in most kitchenware shops or online.

Stamped Brownie Cookies | apt 2b baking co
181212_StampedBrownieCookiesZI4A8380.jpg