Chocolate Mousse Tart with Browned Butter Oat Crust | Raaka Baking Chocolate

202009_Raaka_YossyArefi4216.jpg
202009_Raaka_YossyArefi4190.jpg

One of my very favorite chocolate makers in NYC, Raaka Chocolate, is launching a new line of baking chocolate today! They are starting with two delicious varieties,  Oat Milk 58% cacao that I used in this chocolate mousse tart and Maple Dark 75% cacao. They will launch two more varieties in the coming weeks, and they have cacao powder and cacao nibs too! I got a sneak peek of all four varieties and I have enjoyed baking with (and just plain eating) these little chocolate discs so much. 

This decadent Chocolate Mousse Tart with Browned Butter Oat Crust is definitely fit for a special occasion, but isn’t too tricky to put together. The crust is the easy-peasy pat in the pan variety and the mousse is just as good on its own as it is in this buttery, crisp, toasty crust. You could even just make the chocolate mousse and skip the crust all together, but don’t skip the billowy whipped cream! 

092020_ChocolateMousseTart_YossyArefi.jpg
092020_ChocolateMousseTart_YossyArefi 3.jpg
092020_ChocolateMousseTart_YossyArefi 1.jpg
092020_ChocolateMousseTart_YossyArefi 8.jpg
092020_ChocolateMousseTart_YossyArefi 5.jpg
092020_ChocolateMousseTart_YossyArefi 7.jpg

 Raaka Chocolate is unroasted which highlights all of the natural fruitiness of cacao so it’s flavor profile might be a little different than your everyday chocolate, and it is so, so tasty. They are also a company that values the community of growers, producers, and makers whose livelihoods depend on cacao and chocolate and are very transparent about their sourcing practices. You can read all about it on their website. Let me know if you try it!

202009_Raaka_YossyArefi4252.jpg

 This post was sponsored by Raaka Chocolate.


Oat Milk Chocolate Mousse Tart with Browned Butter Oat Crust

Makes one 9-inch tart

This decadent chocolate tart is more than the sum of its parts. The toasty-oaty crust provides a perfect base for rich and decadent chocolate mousse made with Raaka’s sublimely delicious Oat Milk chocolate. The mousse is delicious on its own for gluten free folks too. 

Browned Butter Oat Crust

1/2 cup (115g) unsalted butter

2/3 cup (60g) rolled oats

1 cup (130g) all purpose flour

1/3 cup (35g) confectioner’s sugar

1/2 teaspoon kosher salt

Water, as needed

Oat Milk Chocolate Mousse

2 tablespoons granulated sugar

2 tablespoons strong coffee or coffee liqueur

3 large egg yolks

Pinch salt

4 ounces Raaka Oat Milk Chocolate finely chopped, plus a little more to garnish

1 1/4 cups heavy cream, divided

Heat your oven to 375ºF and lightly grease a 9-inch removable bottom tart pan.

Brown the butter: Melt the butter in a small saucepan set over medium heat. Make sure to use a pan with a light colored interior so you can see the milk solids change color. Continue to cook the butter, stirring occasionally, scraping the milk solids off of the bottom and sides of the pan as necessary. After a few minutes the milk solids should turn golden brown and smell toasty. Transfer the toasty browned butter to a heat safe container and let it cool slightly.

Add the oats to the bowl of a food processor and pulse a few times until the oats are broken up a bit. Add the flour, confectioners sugar, and salt and pulse about 10 times or until the mixture looks like coarse sand. Drizzle the butter into the mixture and pulse until combined. The mixture should hold together easily when you squeeze it in your hands. If it seems very dry, add water 1 teaspoon at a time until it holds together.

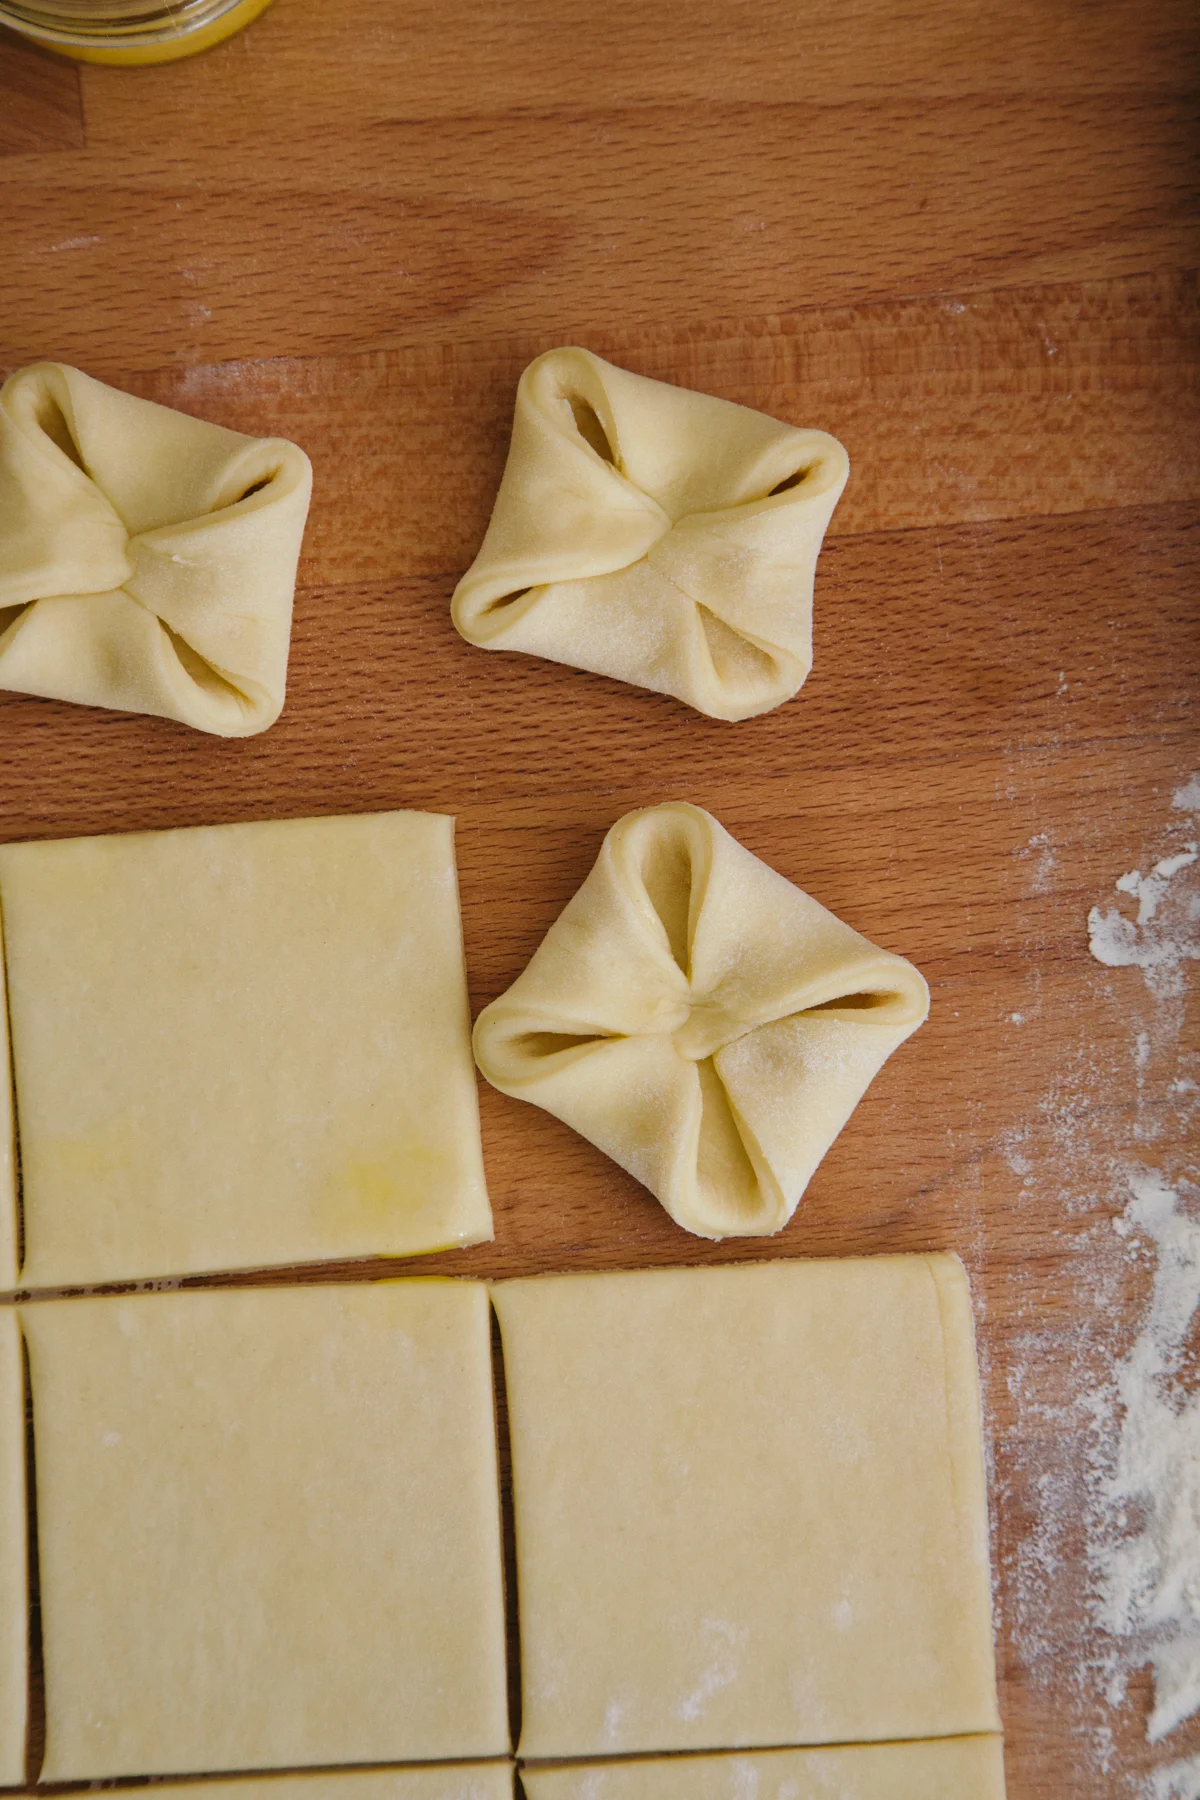
Pour the mixture into the prepared tart pan and press it evenly into the bottom and sides of the pan. Use the bottom of a measuring cup to make the crust smooth and even. Bake the crust until it is golden brown, 20-25 minutes. Set it on a rack to cool completely.

When the shell is cool, make the mousse. 

Whisk 3/4 cup of the heavy cream to soft peaks and store in the refrigerator while you make the rest of the mousse.

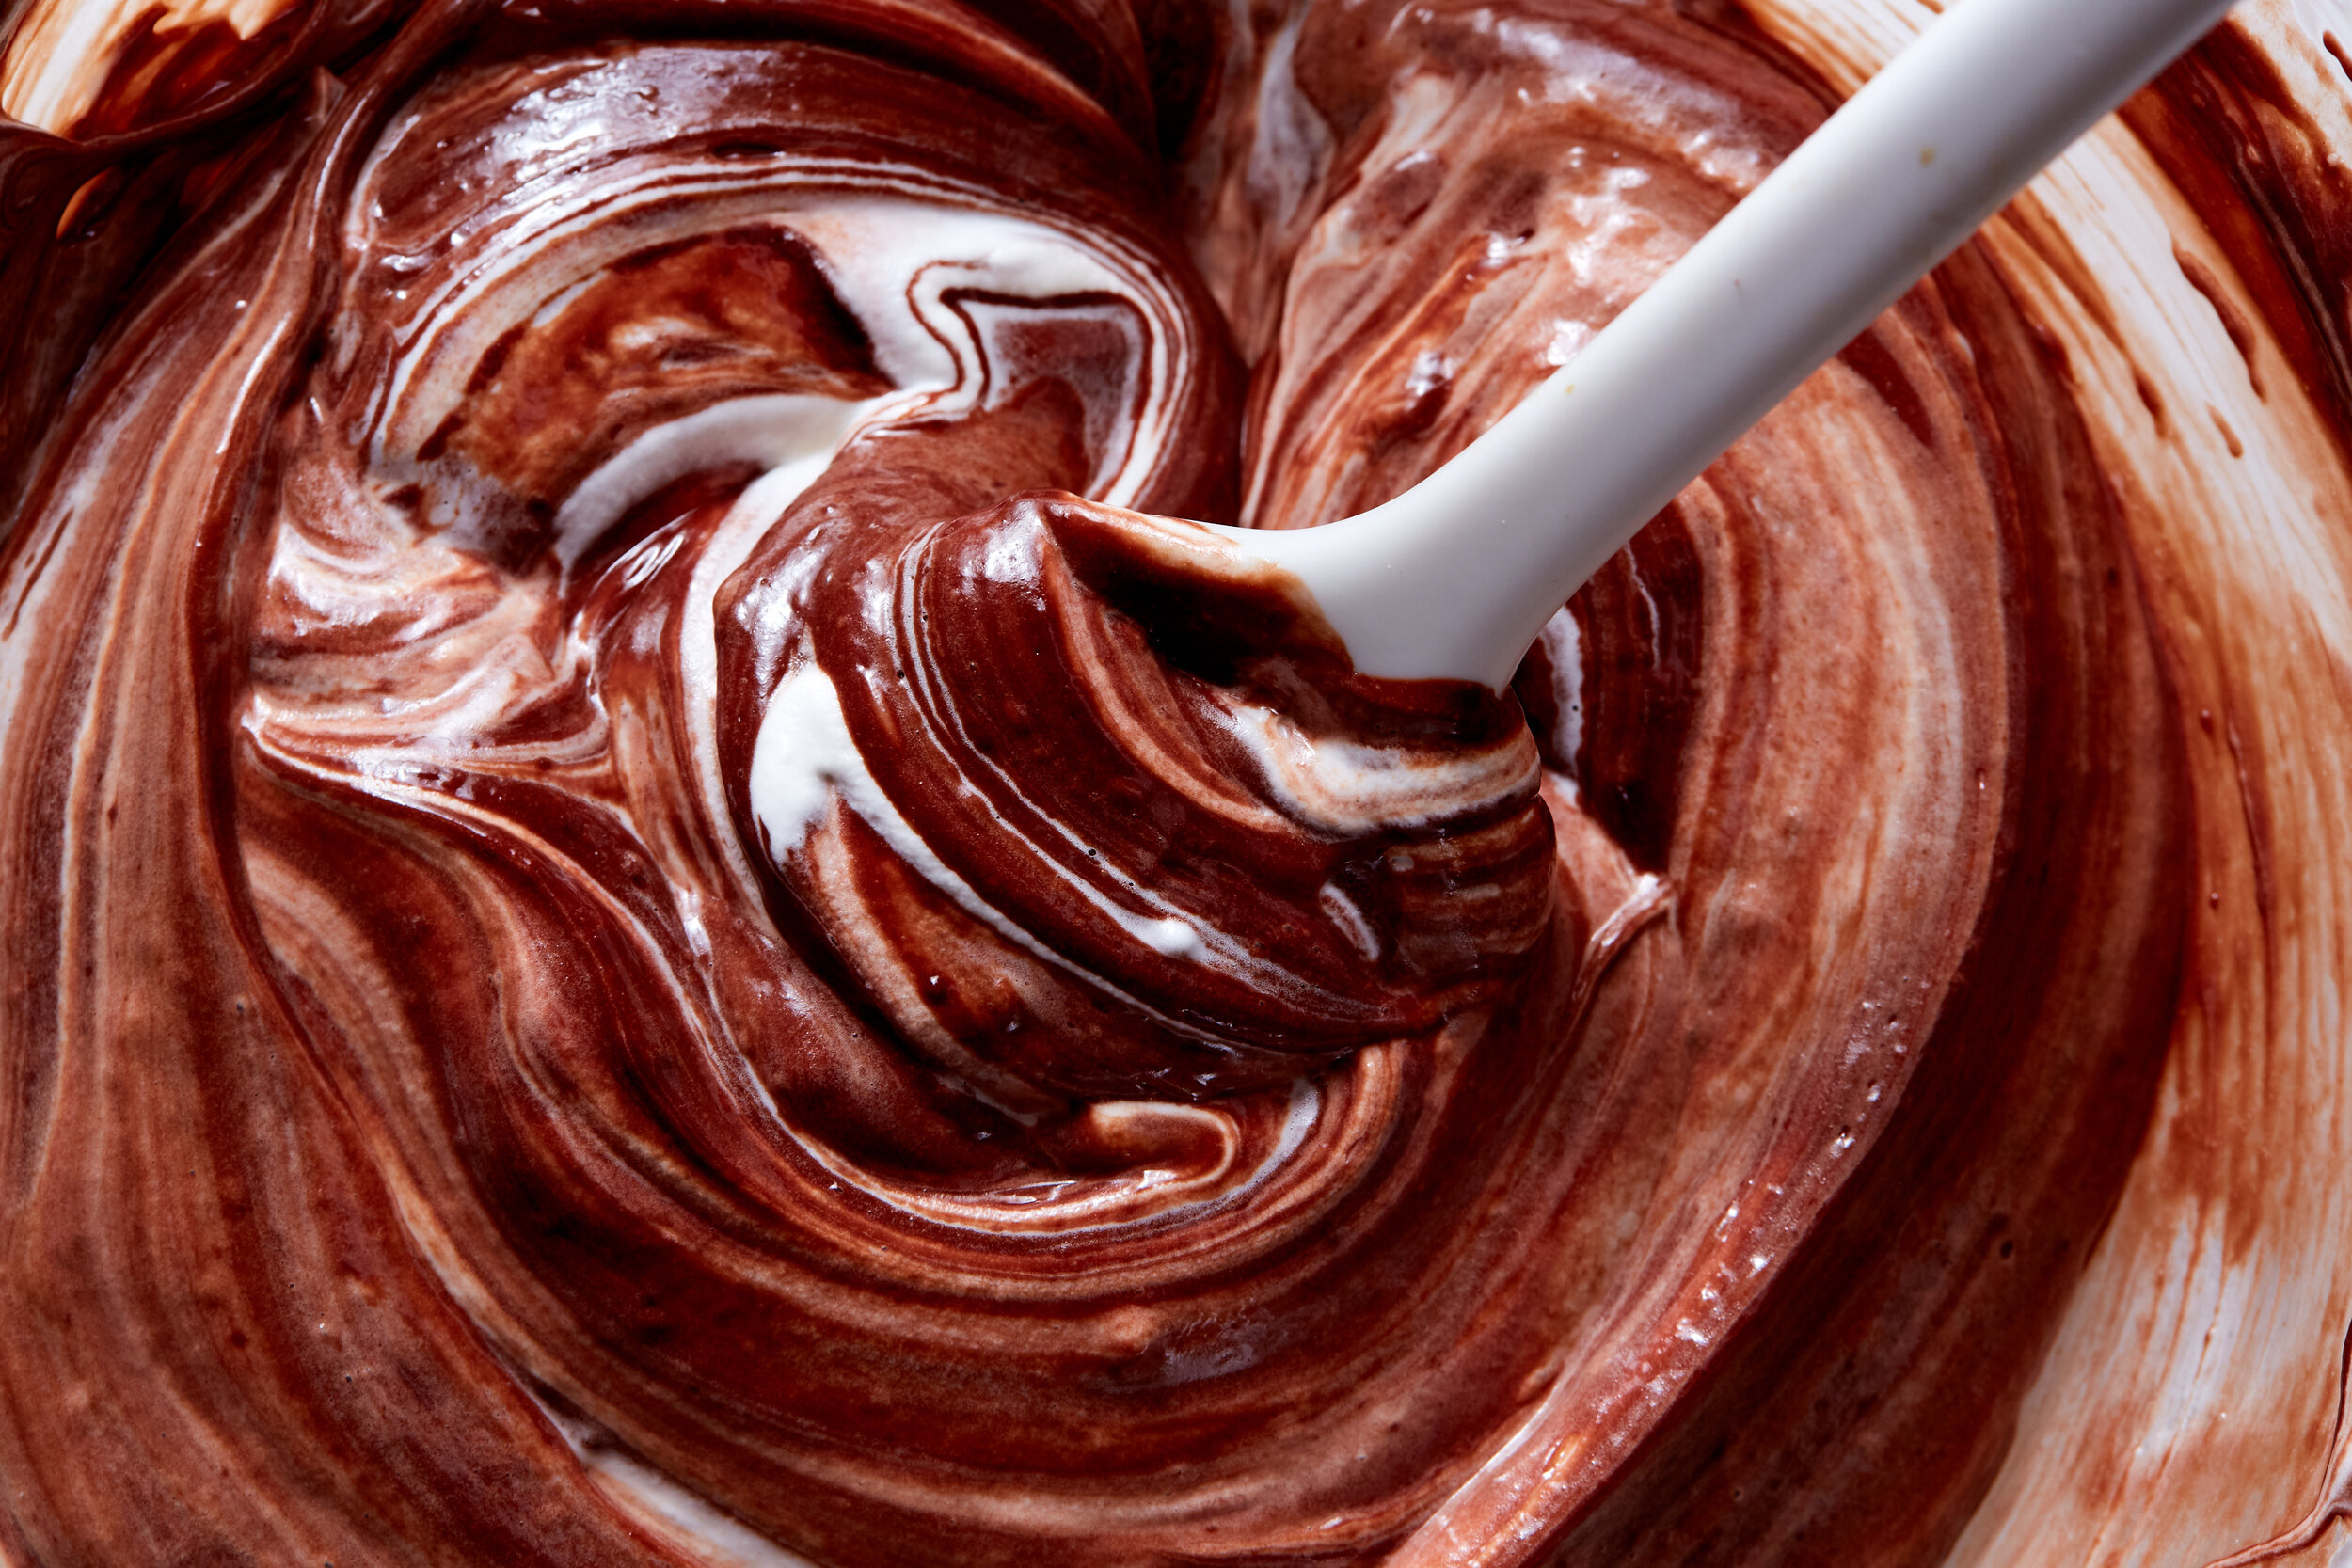
Set a heatsafe bowl over a pan of simmering water to make a double boiler. Add the sugar, coffee, egg yolks, and a pinch of salt to the bowl and whisk the mixture until it is very hot to the touch (about 160ºF), pale yellow and doubled in volume. 

Add the chopped chocolate and whisk until smooth. Off of the heat, add a heaping spoonful of the whipped cream and whisk it into the chocolate mixture to lighten it a bit. Add the rest of the whipped cream and gently fold to combine. Pour the mousse into the cooled shell, smooth the top, and refrigerate until firm, about one hour. Just before serving whip the remaining 1/2 cup cream to soft peaks dollop it over the mousse. Grate a bit more chocolate over the top and serve.

202009_Raaka_YossyArefi4176.jpg

Mini Cheese Danish

cream cheese danish | apt 2b baking co
cream cheese danish-0394.jpg
cream cheese danish | apt 2b baking co
cream cheese danish-0418.jpg
cream cheese danish | apt 2b baking co
cream cheese danish-0427.jpg

I remember hitting up the grocery store pastry case on the way out of town on family road trips and skipping over the chocolate doughnuts to head straight for the danish - cream cheese was always my favorite. Cheese Danish represent the best of all breakfast pastry worlds - crisp buttery pastry, slightly savory filling, and a little bit of sweet glaze. I kind of can't believe I hadn't made them before I found this recipe.

Danishes were always a little intimidating to me because they are made with laminated yeast dough which is time consuming to make and can be a little fussy. I have made croissants a couple of times, but honestly the time and planning it takes to make them is a total turnoff, even if the results are delicious.

But, when I spotted this recipe I knew I had to try it. It comes from Samantha Seneviratne by way of the NY Times and it is SO SMART and a lot less involved than traditional laminated yeast dough. It can also be made way ahead of time, and it's made in the food processor (no knead!) making these perfect for a brunch time treat. 


There are still a few spots available for my food and photography workshop in PARIS this Spring with Olaiya Land. Learn more here


Cheese Danish

makes 9 medium or 16 mini Danish

recipe by Samantha Seneviratne for the NY Times

The Danish dough requires quite a bit of hands-off resting time so make sure to factor that in to your plans. I made these a few times, once with labne instead of cream cheese in the filling which worked great. The filling was a bit softer than the cream cheese version, but the extra tang from the labne was a nice bonus flavor. If you've used labne, you'll need to fill the pastries a bit differently to account for the texture of the filling, instructions are within the recipe. Also, the original recipe calls to make the Danishes a bit bigger, but I loved the idea of little two-bite minis so I went for it.

1 8-ounce package cream cheese (or labne)

1 1/4 cups confectioners’ sugar

1 large egg yolk

pinch salt

1/2 teaspoon vanilla extract

1 batch Danish dough (recipe below)

1 large egg, lightly beaten

2 tablespoons milk

In a large bowl, beat the cream cheese, 1/4 cup confectioners’ sugar, egg yolk, salt and vanilla until smooth. Transfer the mixture to a pastry bag or resealable plastic bag; set aside.

On a lightly floured surface, roll the dough out into a 12 1/2-inch square. Trim 1/4 inch off each edge. Cut the dough into nine 4-inch squares, or 12 2-inch squares for mini danish. Brush the corners of each square with a bit of the beaten egg, then fold each corner into the center and press down gently. Transfer the squares to 2 parchment-lined baking sheets.

Pipe the cheese filling onto the center of each dough square. (If you've made the filling with labne, pipe the pastries half full and reserve the rest of the filling in the fridge while they rise.) Loosely cover the pastries with plastic wrap and let stand until slightly puffed, 60-80 minutes. Heat oven to 425ºF.

Remove the plastic and gently brush the top and sides of the dough with the beaten egg. Bake for 10 minutes, then rotate the sheets and reduce oven temperature to 375 degrees. (If using the labne filling, pipe the remaining filling over the top of the half baked filling) Continue to bake until pastries are puffed and deep golden brown, another 6 to 8 minutes.

Meanwhile, whisk together the remaining 1 cup confectioners’ sugar and the milk. Let the Danish cool slightly on the sheet then drizzle with the glaze. Serve warm or at room temperature.

Danish Dough

1 1/2 cups bread flour, plus more for the work surface and the rolling pin

2 tablespoons granulated sugar

2 teaspoons active dry yeast

3/4 teaspoonkosher salt

14 tablespoons cold, unsalted butter (1 3/4 sticks), roughly cubed

1 large egg

1/4 cup cold milk

Combine the flour, granulated sugar, yeast and salt in the bowl of a food processor. Add the butter and pulse to combine. The butter should be the size of small marbles and peas. Transfer this mixture to a medium bowl.

In a small bowl, whisk the egg, milk, and 2 tablespoons water.

Add the egg mixture to the flour mixture. Using a rubber spatula, fold the mixture until it is evenly moistened. Turn the dough out onto a piece of plastic wrap, shape into a small rectangle, and wrap well. Chill for at least 3 hours, and up to 2 days.

On a lightly floured surface, using a floured rolling pin, roll the dough out to an 8-by-15-inch rectangle. With a short side facing you, fold the dough in thirds like a letter, bringing the top third of the dough down, then folding the bottom third up. Use a bench scraper to help lift and fold the dough if necessary. At this point, the dough will be rough and shaggy with visible butter pieces; as you roll and fold the dough it will come together. Rotate the dough 90 degrees. Repeat the rolling and folding process, then rotate the dough once more and roll and fold again. As you work, dust the work surface, your hands and the rolling pin with flour as necessary. Wrap the dough in plastic wrap and refrigerate for at least 1 hour.

Repeat the entire rolling and folding process one more time for a grand total of six turns. If the dough starts to fight you and become difficult to roll at any point, just pop it in the fridge for an extra rest. Wrap the dough and refrigerate for at least 2 hours, or overnight.